Exploring Solar Power Plants with Google Earth

A video overview of the learning activity is located below in the Teacher Resources/Content Support section of this Web page. This overview shows how to use Google Earth for data gathering in this exploration. You may wish to show your students an overview video as you introduce the learning activity.
1. Begin the class by asking students to respond to the following in their journal: Describe a solar power plant.
2. Inform students that they will use Google Earth to explore solar power plants around the world.
3. Distribute the Exploring Solar Power Plants with Google Earth handout and field guide to each student.
4. Use an LCD projector to display Google Earth at the front of the room.
5. Ask students to launch Google Earth on their computers.
6. If needed, provide a brief orientation of Google Earth layout and navigational tool set.
7. Instruct students to download the Solar Power Plants KML file and view the file in Google Earth.
8. Show students how to navigate from one solar plant to the next.
9. Model how to use the Ruler Tool in Google Earth to measure the perimeter of the first solar plant (Marstal). Have students repeat this task on their computers. Show students possible mistakes they could make while measuring, for example, measuring the fence around the solar power plant.
NOTE: We recommend that you explain to students how they should measure the perimeter around a solar plant. For example, you may wish to have students just measure around the area of the solar panels. Alternatively, you may wish students to include any buildings located adjacent to the solar panels as part of the perimeter. The assessment information takes into account these variations.
NOTE: Plataforma Solar de Almeria has three different solar array areas. You can have students measure each individual solar array area then add up the measurements, or measure around all three solar array areas.
10. Have students measure the perimeter of each solar plant and answer questions on their field guides. Provide guidance to students.
11. Review and discuss aloud student responses to key questions.
12. Ask students if they have any questions about concepts covered in the lesson and respond to their questions.
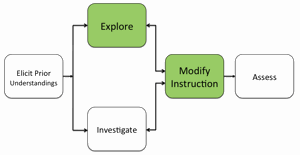
13. If students at the completion of the activity do not understand that ideal locations for large solar power plants include a ground cover area that has a flat open area to capture a lot of sunshine, modify instruction as needed to ensure learner understandings.
14. Have students close and not save Google Earth when they finish.
15. Collect the handouts (and field guides if you have not finished reviewing the activity).
Materials Needed:
Handouts
(1) Exploring Solar Power Plants with Google Earth Teacher Guide (PDF / MS Word)
(2) Exploring Solar Power Plants with Google Earth Student Handout (PDF / MS Word)
(3) Exploring Solar Power Plants with Google Earth Field Guide (PDF / MS Word)
KML File
Solar Power Plants (KML)
